Customer Projects

We always like to get feedback from our customers, regardless of wether its good or bad. It helps us to grow as a company and helps to intergrate us better with the people that we deal with on a day to day basis.
It's not often people will send us pictures of their projects, either partially assembled or completed, so we really get excited when customers not only tell us that they'll send us the information but then actually go ahead and do it!
We always ask customers to send their stuff and every one of them tells us they will do it, but of all those people that tell us they will do it vs the ones that actually do, is probably equal to about 1% of our client base!
Pretty riveting stuff right? So, all things said! Welcome to our customer projects section!
We would just like to send a big thankyou to all the people that have contributed their pictures, time and knowledge for all to see and share!
If your project is something that you are thinking of selling commercially, or, you have a project that yses parts thjat we sell, then we are happy to not only put your project in this section of the website, we are also happy to put links to your products or information for customers to contact you if they want to have something made, or they wish to buy from you!
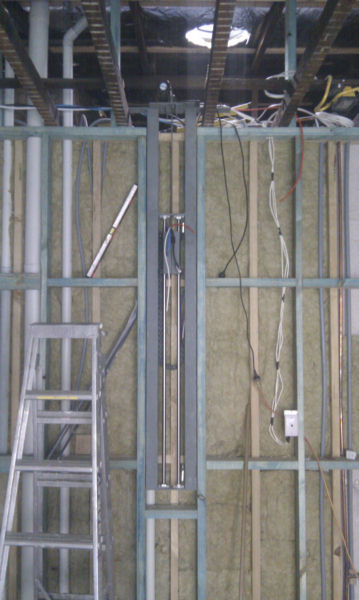
The House Lift
This one I saw personally, and I have to admit, when Chris told me what he was planning I was a little skeptical because the amount of work and re-engineering required was huge.
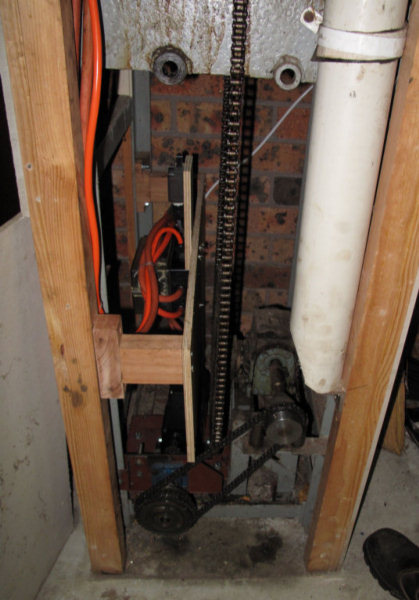
The project was a house lift which started at the garage and had a hand winding mechanism to send the lift up to the second story of the house. It had previously been wired up with a small worm drive, but nobody knows if it ever really worked or if someone had attempted it, then given up as the original motor blew up. Either way, by the time Chris saw it, it had all been disconnected and not working for the past 20 or so years.
The lift was designed to cart groceries from the garage where the car pulled in, to the first floor or second floor. The first floor was the kitchen and the second floor was a bedroom.
The original worm drive motor was a 100w 240v with a very very low speed. We replaced the motor with a Titan 120w AC Induction motor with a 50:1 ratio.
Here's Chris's story!
After I spent one day trying to get the original idea working I realized that it was going to need a new approach. I decided to be rid of the manual control & house it completely under the bottom of the lift. I spent the next day fabricating the brackets & machining & boring the pulleys at work. So I suppose it took one day to make the thing work. It took another one day to re-wire & fit & adjust the limit switches, and associated wiring. The thing has an upper & lower control switch on each level that switches a latching relay until that limit switch turns the relay off when it has reached that level. It also has an indicator to advise the opposite floor that the level has been reached. It has an override stop switch at each level so it can be stopped & restarted at any position. I haven't loaded it up but the motor shows no sign of working hard at all. I don't think that any load that fits inside a cubic meter will affect it. Time will tell!
It runs very quietly - totally successful.
Thanks for the encouragement!
Regards, Chris.
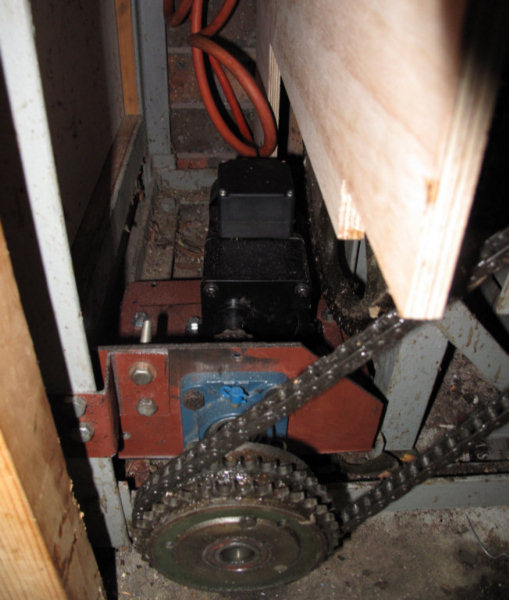
This looks like an old timing chain pulley from an engine. It never ceases to amaze me at the creative ideas that people come up with.
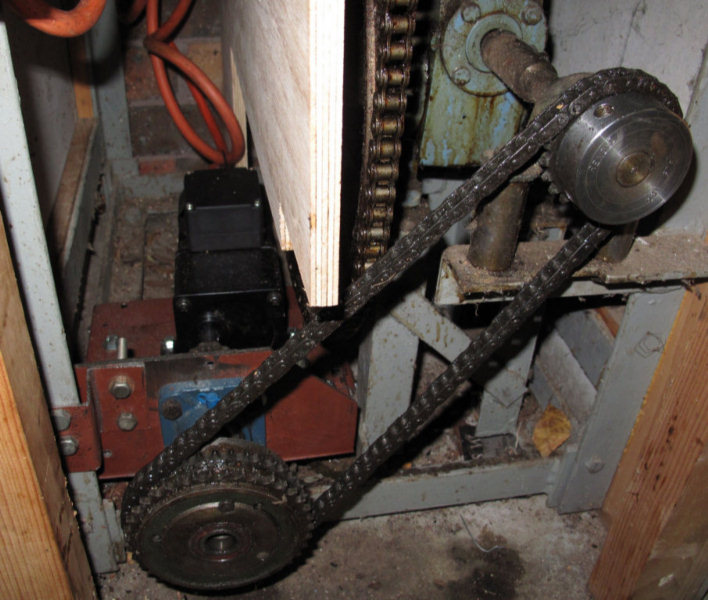
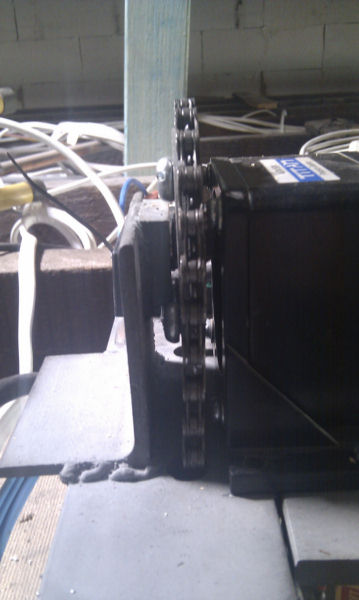
The output shaft cranks a larger shaft with what looks like a 1:1 (?) chain to a right angle gearbox
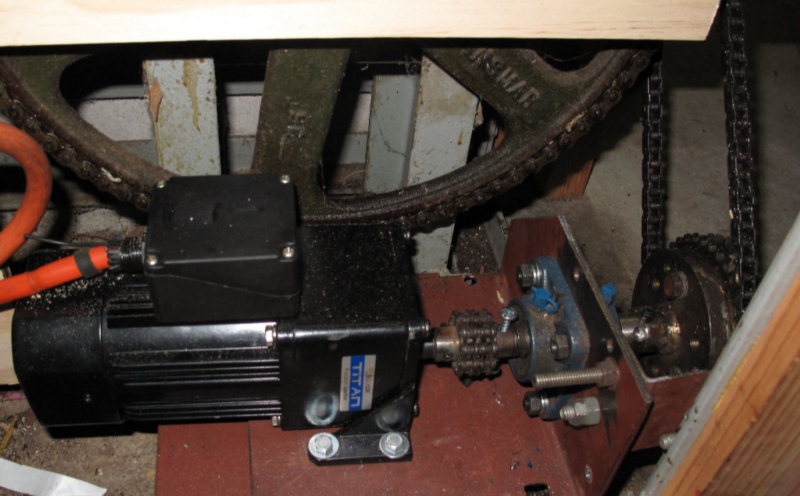
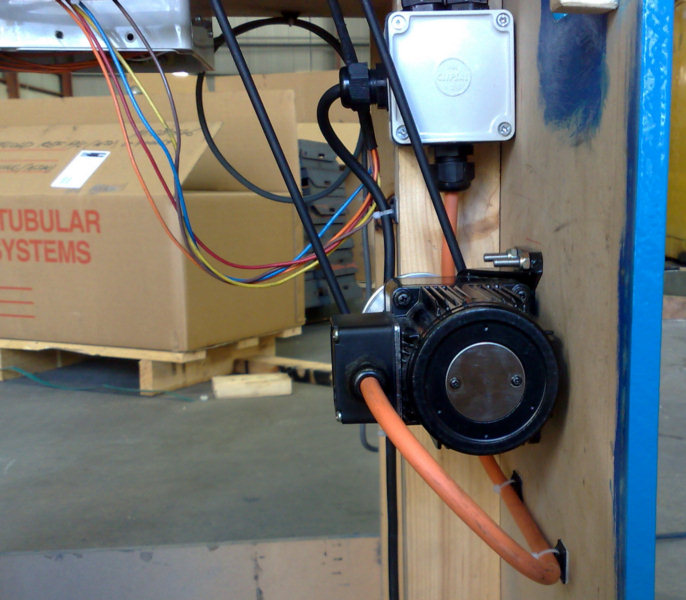
Here we see the motor hooked up to a chain coupling with a heavy duty linkage to take the high radial loads.
An overall shot of the unit.
The Compressor; Demonstration Model
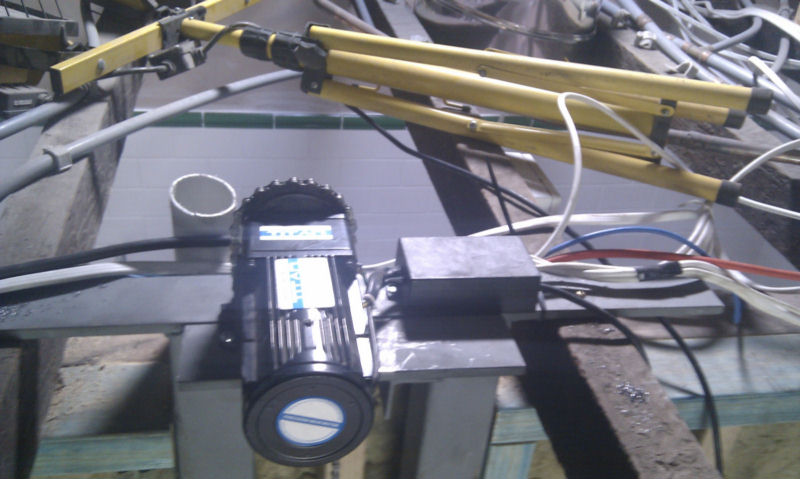
Another customer project, this time to turn two large compressor screws for an air compressor demonstration system that he wanted people to be able to view working at an expo!
Its an impressive setup, which is simple and well engineered. This was created to show customers how the screw concept in the companies air compressors worked as well as to showcase the precision that the company was able to achjeive.
The motor is neatly mounted under the bench where the two large screws are so as to not take away from the display of the twin rotors.
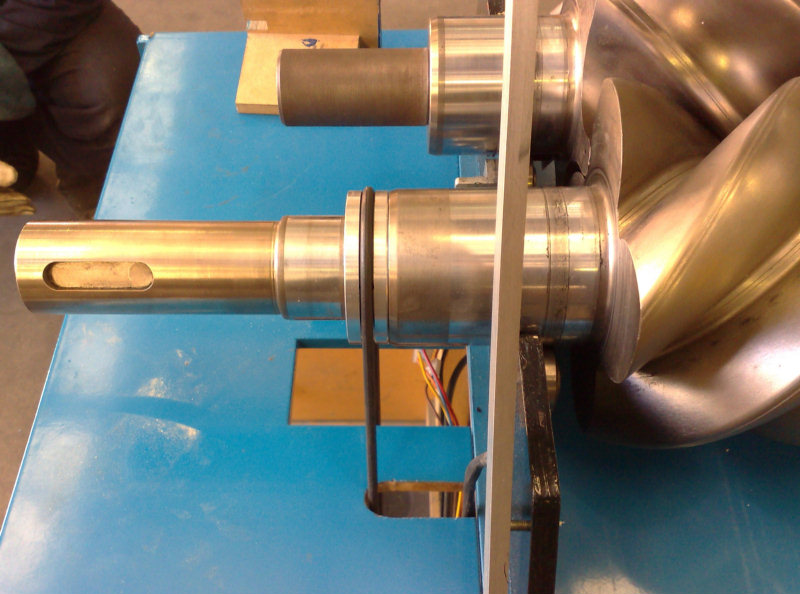
A nice shot showing the belt extending onto the shaft of the large rotor. They actually look quite similar to supercharger rotors. I wonder if they could be adapted? If you *could* do it, you would be moving a MASSIVE amount of air which would probably blow the heads off. Nice to dream though ;)
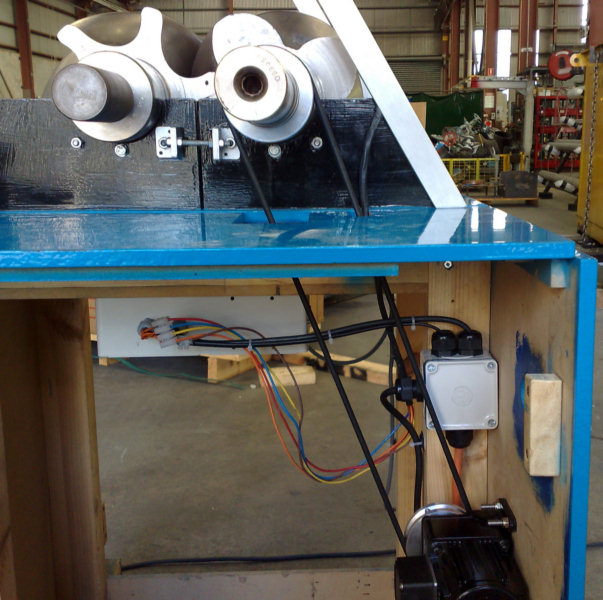
Just as a matter of interest, never ever mount a motor like this one has been. While this was just for demonstration purposes and not so important, the engineer only mounted it this way to check the spacing and tensions on the belt and to make sure everything was lined up correctly. It's always good practice when mounting a motor to any type of non rigid frame that can vibrate, to use rubber grommets between the motor and surface mount so that vibrations don't go through the entire frame of the unit. It's not good for the motor and it can make the overall unit quite noisy to operate as the entire unit and frame all effectively act as a loud speaker!
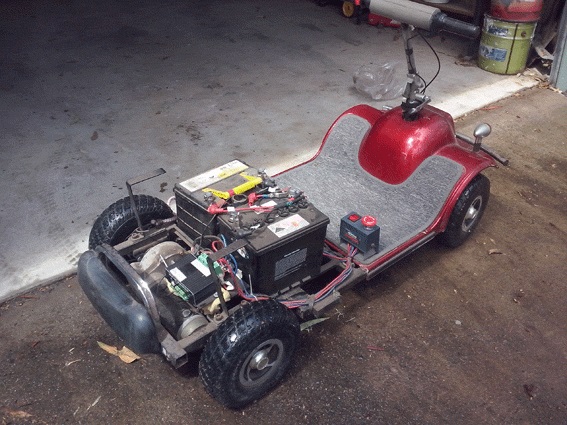
Motorized Golf Caddy
Mick's Golf buddy!
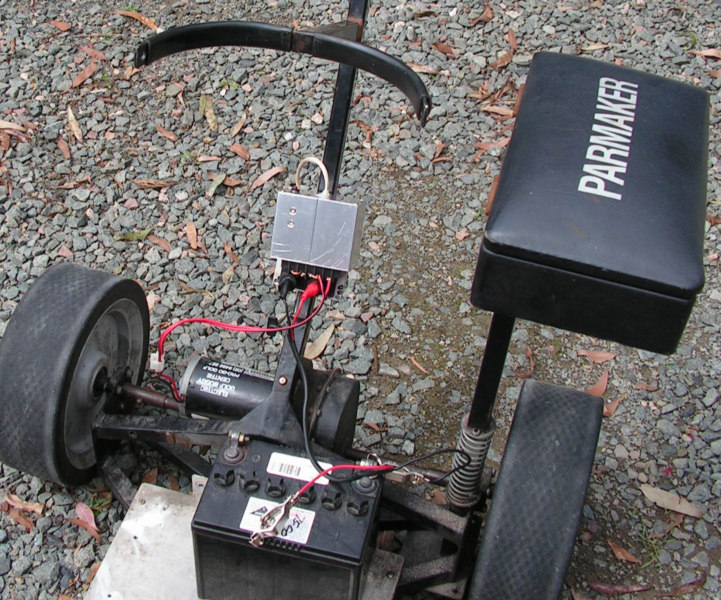
Here we have a shot of one of our 12v to 36V DC Speed Controllers mounted to an early Parmaker golf buggy. I'm not sure how many of you are aware, but Parmaker has been manufacturing the same buggy for well over 3 decades and in that time, very little has changed in the design in the company because if its not broken, dont fix it!
They are known internationally for their reliability and are well regarded on golf courses all around Australia
The sad part is that buying a new controller for these buggies is a VERY expensive endeavour and believe it or not, you can buy the entire buggy secondhand for less than you ban buy a controller NEW, which is obviously why the customer has opted to use our controller instead!
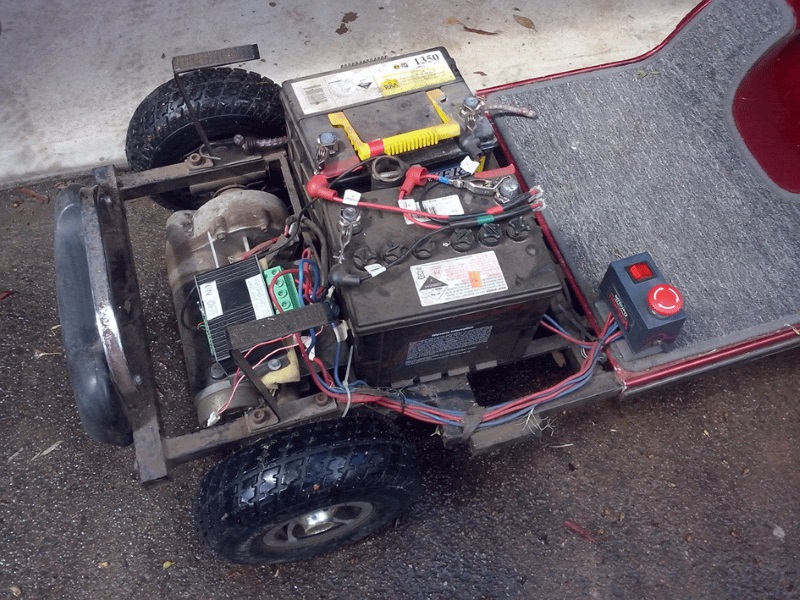
This speed controller is a standard 25A model, with a long lead connected to the potentiometer so that he could feed it through the handle to be the same as the original.
How good is this buggy? I mean I don't play golf, but if I did I would definitely want one of these! And right now I'm thinking of ways to make one, as they look pretty simple, and yet probably cost thousands of dollars to buy new (at least for an Australian made one!). I think I'd extend the wheelbase and add a seat and a better control. Who wants to walk between holes when you could ride?
We also sell similar motors too if anyone wants to make their own.

Daiwa? I thought they made fishing gear? Nice and simple setup! The simplicity iss what makes these buggies so reliable, plus Parmaker are known to manufacture all their own parts here in Australia which might make them a little more expensive than a Chinese mass produced buggy, but has the advantage of making the system a lot more rugged and really, built to our touch Australian climate!
Efficient. Gear like this never breaks down. Well, except this one did, but it wasn't the mechanical parts that failed, it was the electronics, which could have been caused by any number of factors.
Tank Rumbler
This next project is from Neil, who's made a tank rumbler/cleaner!
This is probably one of the most asked about projects by customers. This roller has been adapted for river stones, to smooth them out, but can also be used for LPG tanks and Gas cylinders to remove any surface rust internally and another customer even built one to remove rust from inside petrol tanks of cars and motorbikes.
This is probably one of the most asked about projects by customers. This roller has been adapted for river stones, to smooth them out, but can also be used for LPG tanks and Gas cylinders to remove any surface rust internally and another customer even built one to remove rust from inside petrol tanks of cars and motorbikes.
Here's some pictures of the rumbler.
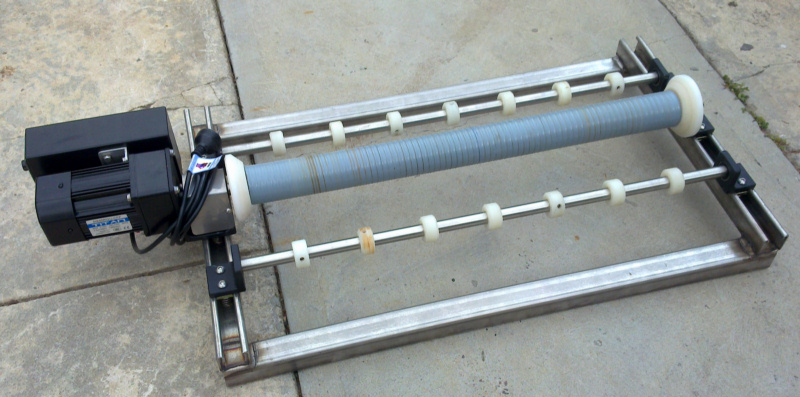
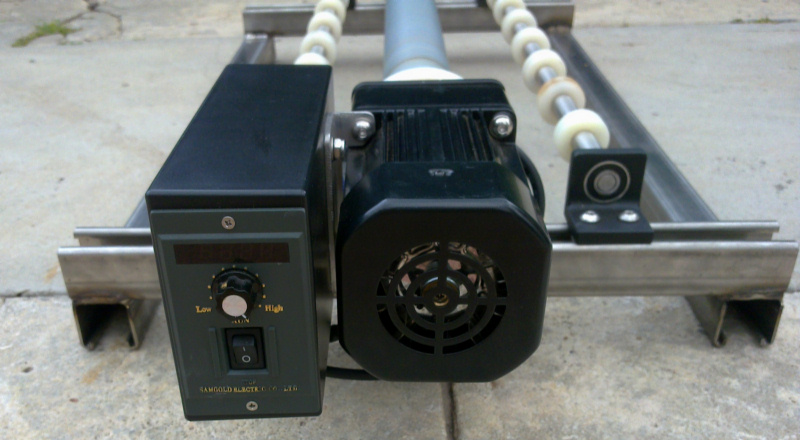
It's a stainless frame and rollers with your motor and gearbox turning the grey centre roller, as you can see it takes 2 tanks.
This is the 1st one I built. As you can see it sits 2 fully laden tanks on and drives quite well....this one has the 60w motor ( and handles the load very well) those 2 tanks weigh 10kg each and with 12kg of grinding media in them the total rolling weight is 44+ kg.
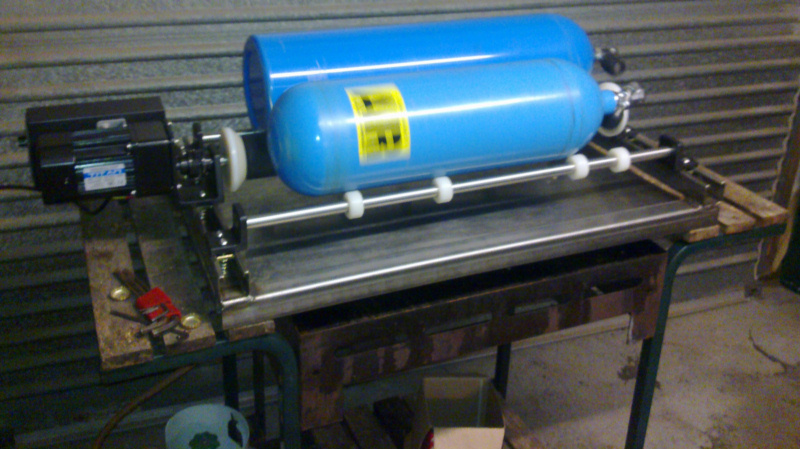
A shot of the rumbler in action! Notice the simplicity in the construction. This puts most of the load directly onto the gearbox, which is well up to the task.
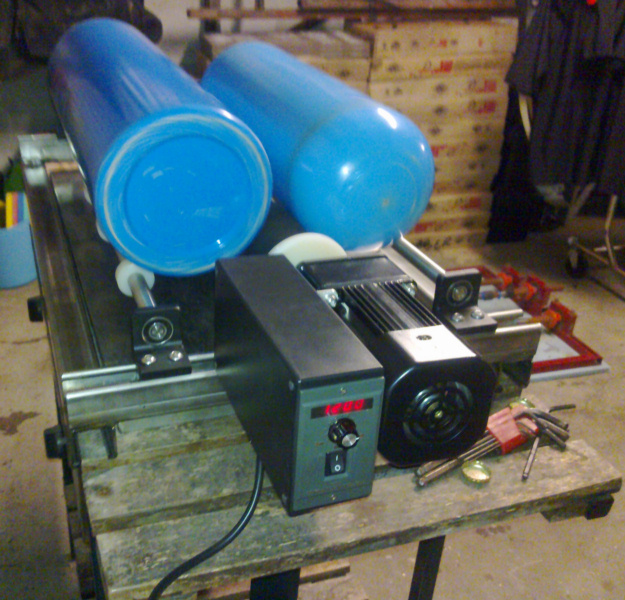
A shot of the control Panel Its a 60w AC Speed Control Motor with a digital speed control module. With the speed control module, you only get to see the motor speed, it doesn't factor in the gearbox at all which is a shame, but it makes it very easy to set the speed in the future if you find one speed that works better than all the others!
Some decent engineering gone into this! Very well built!

A shot of the Titan Motor powering this unit! As you can see, while it may be Chinese made, its a well built motor and gearbox with lots of customization making it even better!
A shot of the controller, you can see the fan under the cowling at the rear of the motor keeping the unit cool!
Jet Engine Propelled Motorbike
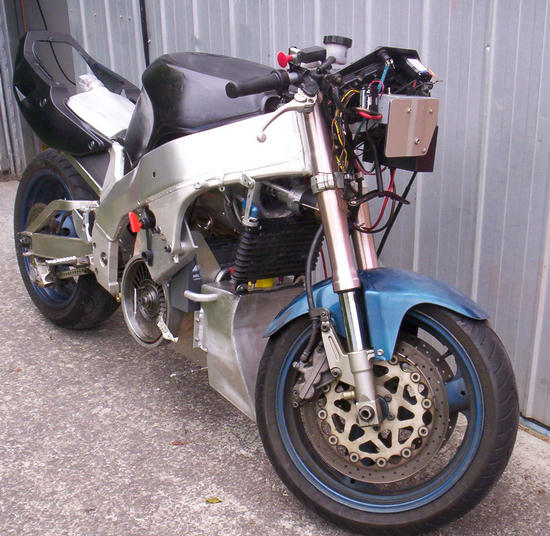
This was definitely one of the more interesting crowds we have had the honour of working with, and their project? The Jet Bike! didn't catch that ? the JET bike!
We couldn't release pictures until we were given the OK, but there's a little bit of Motion Dynamics in each of these rockets! (though we can't tell you what!) But believe me, we were super happy to be a part of this project!
Custom made from the ground up, this commercial work is the brainchild of quite a lot of different people, all working towards the same goal! (a faster way to die!)
But god, isn't it beautiful? When you get it up to top speed, you no longer need the seat, you pretty much just hang on and let the wind flap you about. Don't worry though, nobody will notice because to other motorists, you'll just be a blur.

Home made TV Lift!
Thanks to Alex, we have a TV lift built by one of our talented customers for his home entertainment area.
He's basically created his own home built TV lift that's more powerful than what you can buy commercially (at least without spending the cost of a bionic arm and leg!) and looks simple and efficient to operate (but maybe not so easy to design and build!)
Good job alex, this is some fantastic engineering I'd be proud to have built and installed in my house!
A few words from Alex!
Hola,
This probably arrives as a bit of a random email but I've cobbled together a
wall mount for my TV from parts supplied by you. Just for interest, a few pics
and a video of it working (picture thanks to Vimeo)...
Motion Dynamics - braked AC motor driving the unit
Cheeky Transport - chain and sprocket
SES Linear - linear bearings guiding the TV "carriage"
Jaycar provided the switches (limit microswitches and DPDT centre off toggle),
steel was sourced at Mascot Steel (side beams recycled from house renovations
though), cable carrier is a Igus "energychain".
Anyway - thanks for the various bits and assistance that helped pull this
together.
Alex.
Controller on Gopher
Thanks to David for supplying these pictures and letting us use them here!
I think that this is a really cool project! not only would it be really fun to ride arround on, but its an excellent way to demonstrate what our controllers are capable of and show that a quality build can still be achieved, even whilst on a strict budget!
Words from the man himself! Over to you Dave!
I used one of your controllers and twist grip throttle to turn this old Gopher into a kids play cart. Runs for a day on a couple of old car batteries. Uses a rocker switch to provide forward/reverse. Round button is a kill switch. Brakes are bicycle hand levers and a disk brake fitted to a rear wheel. Its been working fine for 12 months."

As you can see in this picture, even a job thats been hacked together can be well engineered and well built. All of the wires and the controller are laid out really well and safety has been considered in case of a failure!
Perfect demonstration of how (with the right engineering) a job can still be done easily while on a budget.
In regards to the safety switch, its ALWAYS a good idea to have one, even if you don't need it!
Almost 99.99999% of mosfets in controllers die in a dead short.. That means that if your controller is connected directly to the battery with a fuse and then directly from the controller to the motor, thats a recepie for disaster. The controller goes and you physically have NO way to control the motor and because the mosfet is now a non responsive and SHORTED part your motor is going at full speed and your fuse won't protect you because there isn't a short to ground!
You have NO way to stop it unless you can remove the battery leads or motor leads somehow and if you are on a cart or bike or trike or whatever, you need to be focusing on staying aline! So a cheap electronic stop can mean the difference between a graceful failure and a injury prone failure!
Take a look at our E-Stops. They are cheap but incredibly well built!
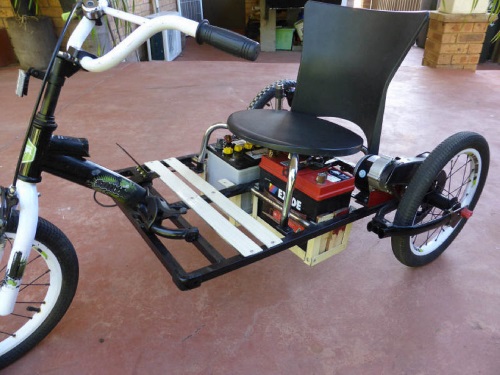
Motorised Trike
This is a really cool, and yet really elegant project!
Thank you to John, who supplied us with the picture and gave us permission to show it to you all!
So this is basically the front of a bike, put on to an beautifully built custom made frame! Ingenuity at its best!
Attach a 250W motor and a controller to this bad boy, with a foot pedal and you've got yourself a really nice looking trike!
Hail to the king, baby! This customer knows where its at!
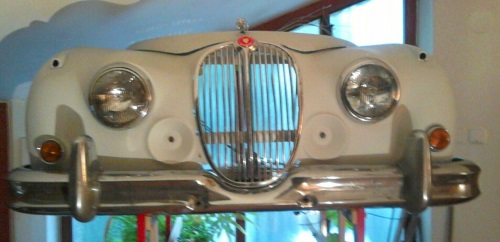
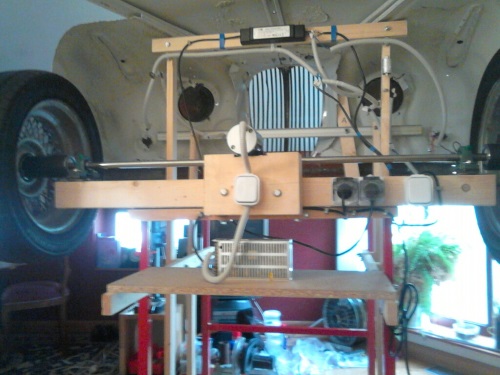
Jaguar Project
Front end of an old Jaguar with rotating wheels attached to a 7712 Worm drive motor. This sits above a public bar, and has been running for years, keeping drunken patrons amused for hours on end! Who wouldn't enjoy watching this move while pondering lifes problems over a nice frosty beer on a warm summer eve. I just talked myself into wanting a beer.
I wish I had a video of this!
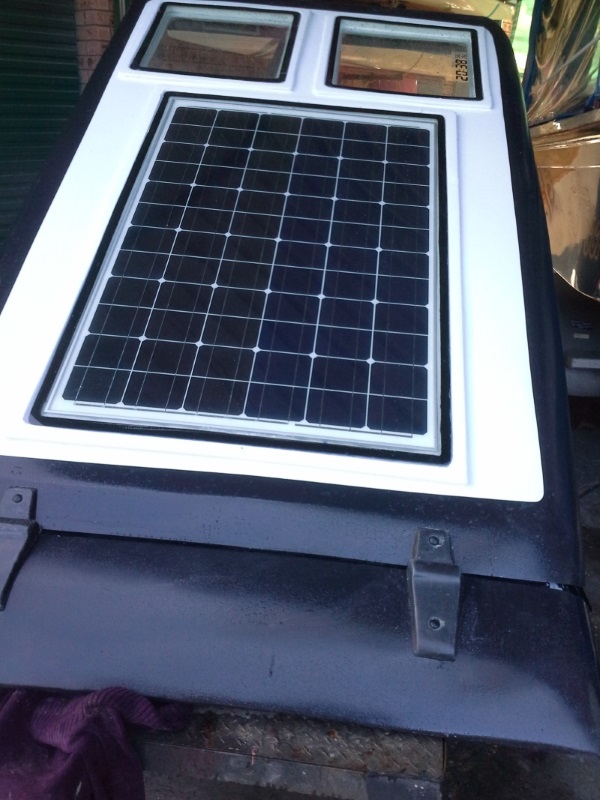
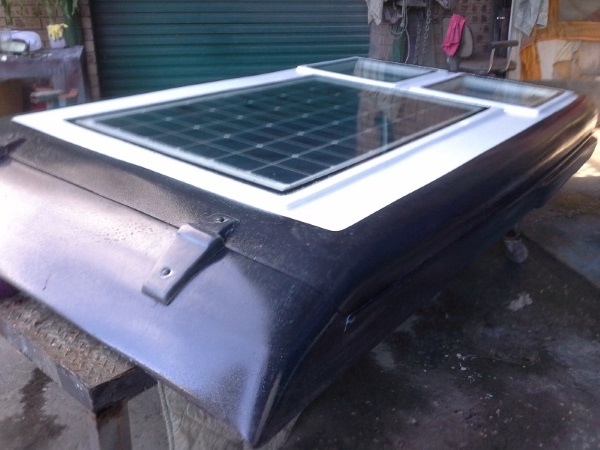
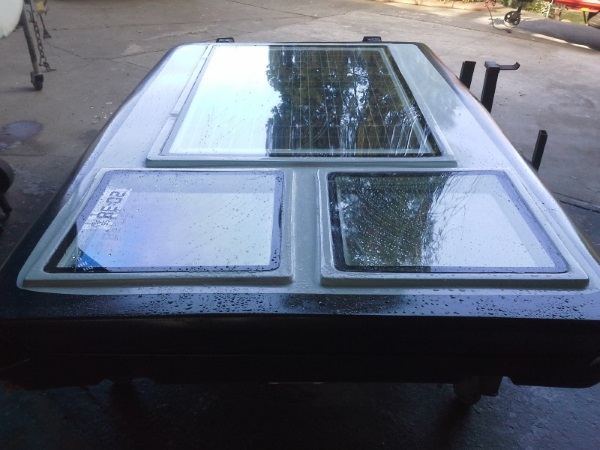
Lifting roof top
One of our linear actuators showing off its massive torque, lifting this monster rooftop!
The actuator he's using is a waterproof IP65 light industrial actuator. One of the best you can buy and will give him years of relaible service! That's some heavy duty engineering right there!

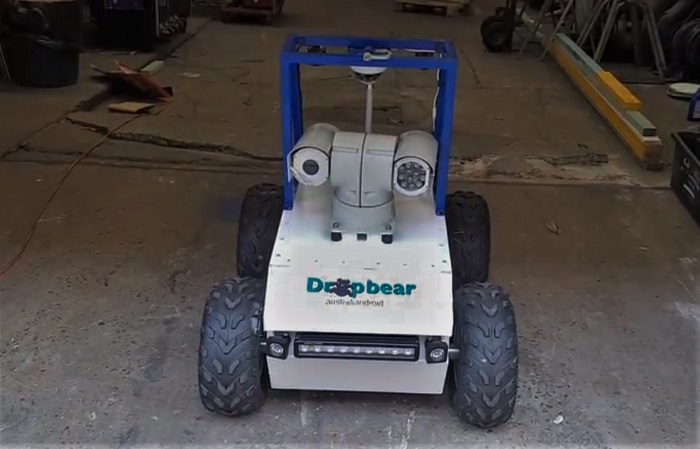
Dropbear - Underground Inspection Robot
The vehicle has been developed over several years, with numerous iterations in cooperation with a number of commercial (operating) mines that require a reliable method of inspecting areas which are hazardous to personnel. Such areas could potentially include blocked ore passes, blocked draw points or areas of unstable ground. You know, places where if you were to send people, they would literally die. And nobody wants that!
As can be seen in the video below, the drop bear is fitted with powerful LED illuminators and a High Power (40x), High Definition (1080p) IP camera with continuous 360 degree pan and 180 degree tilt. The robot also has a backup camera for driving or reversing. The Dropbear is connected to a 5.8gHz mesh network where cheap repeaters mounted in small cheap remote controlled "disposable" robots can be used to increase the strength and bandwidth of signal as the Dropbear moves out of line of sight.